The rubber seal on a washing machine, also known as the gasket, plays a crucial role in keeping water inside the drum during every wash cycle. However, this flexible ring around the door can trap moisture, detergent residue, lint, and debris.
Over time, this buildup can lead to mold growth, unpleasant odors, drainage issues, and even damage to the seal itself.
If your laundry smells musty even after washing, the gasket may be the hidden culprit. Regular maintenance helps extend the life of your appliance and keeps your clothes smelling fresh. Below is a complete, step-by-step guide to cleaning and maintaining your washing machine gasket properly and safely.
Why Cleaning the Rubber Gasket Is Important?
Front-load washing machines are particularly prone to grime accumulation around the door seal because water collects in the folds. While top-loading washers with a rubber seal are less likely to develop strong odors or mold problems, they still benefit from periodic cleaning.
If left unchecked, residue and trapped moisture can:
- Cause mold and mildew buildup
- Produce a musty smell in laundry
- Weaken the rubber seal over time
- Lead to leaks or drainage problems
- Shorten the lifespan of the appliance
Routine care helps prevent these issues before they start.
How Often Should You Clean the Washing Machine Seal?
You don’t need to deep-clean the gasket after every wash, but a consistent schedule makes a big difference.
- Deep clean every month or after approximately 30 wash cycles
- Wipe down the seal after each load to prevent moisture buildup
- Leave the door open between washes to allow proper drying
Front-loading washers require more attention, but both machine types benefit from regular maintenance.
Safety Precautions Before You Begin
Before cleaning the rubber seal, follow these essential safety tips:
- Wear rubber gloves to protect your hands
- Ensure the laundry area is well ventilated
- Avoid using undiluted bleach or vinegar
- Do not use abrasive tools such as steel wool or stiff brushes
Full-strength bleach or vinegar can gradually break down rubber material. Even if no immediate damage appears, long-term use can cause cracks and deterioration. Never mix bleach and vinegar, as this combination produces toxic fumes.
Supplies You’ll Need
Gather the following items before starting:
- Rubber gloves
- White vinegar
- Warm water
- Small bowl
- Clean microfiber cloths
- Toothbrush
- Towels
Step-by-Step: How to Clean the Washing Machine Rubber Seal
1. Make Sure the Machine Is Empty
Ensure there are no clothes inside the washer before cleaning.
2. Prepare a Cleaning Solution
Mix equal parts white vinegar and warm water in a small bowl.
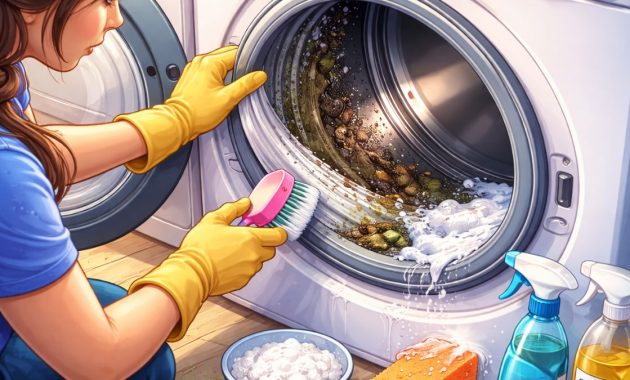
3. Wipe Down the Gasket
Put on gloves. Dip a clean microfiber cloth into the vinegar solution and thoroughly wipe all surfaces of the rubber seal. Pay special attention to:
- Inner folds
- Seams
- Edges
- Hidden crevices
Gently pull back the folds with your fingers to remove trapped debris.
4. Scrub Tight Spaces
Use a toothbrush dipped in the cleaning solution to reach narrow areas where buildup is difficult to remove.
5. Dry the Seal
Use a clean towel to completely dry the rubber seal, including inside the folds.
6. Let It Air Dry
Keep the washing machine door open to ensure the gasket dries fully.
Removing Stubborn Mold and Mildew Stains
For heavy grime or visible mold stains, a diluted bleach solution may be necessary.
Bleach Cleaning Method
- Mix ¾ cup of bleach with one gallon of warm water.
- Wear gloves and dip a cloth into the solution.
- Wipe the gasket thoroughly, ensuring folds and crevices are saturated.
- Allow the solution to sit for five minutes.
- Scrub gently using a non-abrasive sponge.
- Rinse the area with a clean cloth dipped in plain water.
- Dry thoroughly with a towel.
- Leave the door open until fully dry.
Again, never combine bleach and vinegar during cleaning.
Tips to Keep the Washing Machine Seal Cleaner for Longer
Following simple habits can reduce the need for deep scrubbing:
Wipe After Every Load
Use a dry cloth to remove moisture, soap residue, and lint from the gasket.
Leave the Door Open
Keeping the door ajar prevents trapped moisture, which encourages mold growth.
Remove Laundry Promptly
Leaving damp clothes inside the washer creates the perfect environment for mildew.
Use the Right Amount of Detergent
Excess detergent produces extra suds, leaving residue on the rubber seal and other components.
Clean the Entire Machine Regularly
Don’t forget other parts of the washer where grime can accumulate.
The washing machine rubber seal may seem like a small component, but neglecting it can lead to unpleasant odors, mold buildup, and long-term appliance damage. With simple monthly deep cleaning and quick wipe-downs between loads, you can maintain a fresh-smelling washer and extend its lifespan.
Using diluted cleaning solutions and avoiding harsh products ensures the rubber gasket stays flexible and intact. A little preventive care goes a long way in keeping both your washing machine and your laundry in top condition.
FAQs
1. How do I know if my washing machine gasket has mold?
If you notice black spots, a musty smell, or residue inside the rubber folds, mold or mildew may be present.
2. Can I use straight bleach to clean the rubber seal?
No. Undiluted bleach can damage and weaken the rubber over time. Always dilute it properly before use.
3. Why does my washing machine smell even after cleaning?
The odor may come from detergent buildup, trapped moisture, or other internal parts of the washer that also need cleaning.